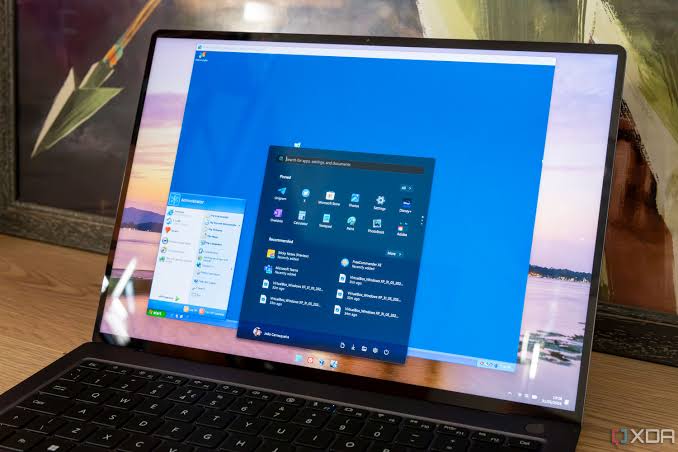
Virtual machines (VMs) are an invaluable tool for developers, testers, and IT professionals. They allow you to create isolated environments on your laptop for testing software, running different operating systems, or developing without affecting your primary setup. In this guide, we’ll show you how to install and use virtual machines on your laptop for testing and development purposes.
Why Use Virtual Machines for Testing and Development?
Virtual machines provide numerous advantages for testing and development:
- Isolation: VMs allow you to create isolated environments, ensuring that your testing and development activities don’t interfere with your primary operating system.
- Multiple OSes: You can run different operating systems (e.g., Windows, Linux, macOS) simultaneously, making it easier to test cross-platform software.
- Snapshots: Virtual machines let you take snapshots of your environment at any given point, enabling you to easily revert to a previous state.
- Resource Efficiency: Running multiple virtual machines is more efficient than having multiple physical machines for testing or development purposes.
Let’s dive into how to install and use VMs for your development or testing needs.
Step 1: Choose Your Virtual Machine Software
Before setting up a virtual machine, you’ll need to choose virtualization software. The two most popular options are:
- VMware Workstation Player (free for personal use): A robust, feature-packed VM software suitable for most use cases.
- Oracle VirtualBox (free and open-source): A great choice for those who need a free, cross-platform option.
Both tools allow you to run various operating systems inside a virtual machine on your laptop.
Step 2: Download and Install Virtual Machine Software
VMware Workstation Player:
- Go to the VMware Workstation Player website: https://www.vmware.com/products/workstation-player.
- Download the software and follow the installation prompts.
- After installation, launch VMware Workstation Player.
Oracle VirtualBox:
- Visit the Oracle VirtualBox website: https://www.virtualbox.org/.
- Download the version for your operating system (Windows, macOS, or Linux).
- Follow the installation instructions and launch Oracle VirtualBox after installation.
Step 3: Create a New Virtual Machine
Once the virtualization software is installed, it’s time to create your first virtual machine.
VMware Workstation Player:
- Open VMware Workstation Player and click Create a New Virtual Machine.
- Choose the Installer disc image file (ISO) option if you have a disk image of the OS you want to install (e.g., a Windows or Linux ISO file).
- Select the ISO file from your computer or enter the path to your installer.
- Allocate resources like RAM (at least 4GB for testing and development) and CPU cores.
- Specify the hard disk space for your virtual machine (at least 20GB is recommended).
- Complete the setup process and click Finish.
Oracle VirtualBox:
- Launch Oracle VirtualBox and click New.
- Enter a name for your virtual machine and select the operating system type (e.g., Windows, Linux).
- Allocate memory (4GB or more for testing).
- Create a virtual hard disk with at least 20GB of space for your VM.
- Follow the prompts to finish the setup.
Step 4: Install the Operating System
Now that you’ve created the virtual machine, it’s time to install the operating system.
- Start the virtual machine you created.
- The VM will boot from the ISO file or installation media you selected earlier.
- Follow the installation steps as you would on a physical computer.
- After installation, your virtual machine will have its own operating system, completely isolated from your laptop’s main system.
Step 5: Install Guest Additions or VMware Tools (Optional)
To enhance the functionality of your virtual machine, you can install additional tools:
- VMware Tools (for VMware): These tools improve performance and enable features like shared folders and copy-pasting between the VM and the host machine.
- To install, click on VM in the menu bar and select Install VMware Tools.
- Guest Additions (for VirtualBox): Similar to VMware Tools, VirtualBox Guest Additions offer features like seamless mouse integration, shared folders, and improved video performance.
- To install, click Devices > Insert Guest Additions CD image.
Step 6: Snapshot Your Virtual Machine
Snapshots allow you to save the exact state of your virtual machine. This is particularly useful for testing and development, as you can easily return to a clean setup after making changes.
- In VMware Workstation Player, click VM > Snapshot > Take Snapshot.
- In VirtualBox, click Machine > Take Snapshot.
Step 7: Use Your Virtual Machine for Testing or Development
Now that your virtual machine is set up, you can use it for various purposes:
- Software Testing: Install and test software without worrying about impacting your laptop’s main operating system.
- Development Environments: Set up different development stacks (e.g., LAMP, MEAN) on various VMs for cross-platform development.
- Learning and Experimentation: Use VMs to experiment with new operating systems or configurations.
Step 8: Manage and Optimize Virtual Machines
Over time, you might need to manage multiple VMs. Consider the following:
- Allocate More Resources: If your VM feels slow, allocate more RAM or CPU cores (ensure your laptop can handle it).
- Clean Up: Delete old snapshots and unused VMs to save space.
- Back Up VMs: For important projects, back up your VM files to external storage.
Conclusion: Enhance Your Testing and Development with Virtual Machines
Virtual machines provide a versatile and powerful way to test, develop, and experiment without the risk of disrupting your primary system. By following these steps, you can set up and optimize VMs on your laptop, creating isolated environments for a range of testing and development tasks.
Ready to start using virtual machines? Download VMware Workstation Player or Oracle VirtualBox, and begin building your ideal testing and development setup today!

