Hello guys, welcome to PSero. We’re the largest computer dealer currently and we deliver worldwide. In this post, we want to share with you how to recover your permanently deleted files on an Apple MacBook laptop or desktop. Sometimes one can mistakenly delete relevant files or photos. If for any reason you wish to recover permanently deleted files or photos then here’s how to go about it. In this tutorial, we will tackle the question How can I recover permanently deleted files from Mac
Recovering permanently deleted files from a Mac can be challenging, but there are several methods you can try. Here’s a comprehensive guide to help you recover your lost files:
1. Check Trash Bin
If you haven’t emptied the Trash, your files might still be there:
- Open Trash: Click on the Trash icon in your dock.
- Search for Files: Look for the files you want to recover.
- Restore Files: Right-click on the files and select “Put Back” to restore them to their original location.
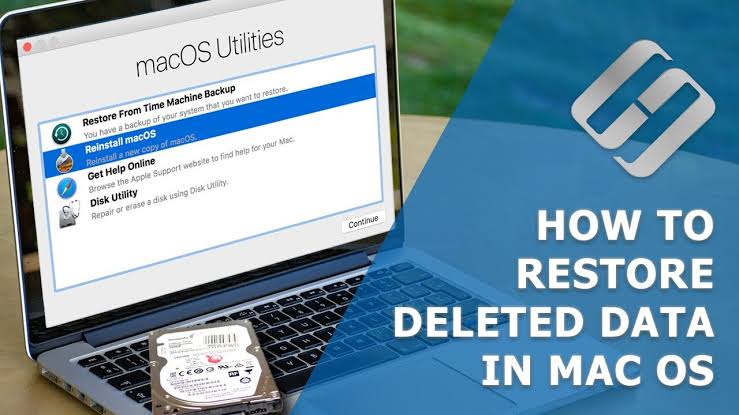
2. Use Time Machine Backup
If you have Time Machine set up, you can restore deleted files from your backup:
- Connect Backup Drive: Connect your Time Machine backup drive to your Mac.
- Enter Time Machine: Click on the Time Machine icon in the menu bar and select “Enter Time Machine.”
- Navigate Through Backups: Use the timeline on the right to find a backup that contains the deleted files.
- Restore Files: Select the files and click “Restore.”
3. Use iCloud Drive
If you use iCloud Drive to store your files, you may be able to recover deleted files from there:
- Go to iCloud.com: Visit iCloud.com and log in with your Apple ID.
- Check iCloud Drive: Click on “iCloud Drive” to see if your files are there.
- Recently Deleted: Check the “Recently Deleted” folder for your files and restore them if available.
4. Use Data Recovery Software
When files are permanently deleted, they can sometimes still be recovered using specialized software. Here are some popular data recovery tools for Mac:
Disk Drill
- Download and Install: Download Disk Drill from CleverFiles and install it on your Mac.
- Launch Disk Drill: Open Disk Drill and select the drive you want to scan.
- Scan for Files: Click “Search for lost data” to start the scanning process.
- Preview and Recover: Once the scan is complete, preview the files and select the ones you want to recover. Click “Recover” to restore them.
EaseUS Data Recovery Wizard
- Download and Install: Download EaseUS Data Recovery Wizard from EaseUS and install it.
- Launch the Software: Open EaseUS and select the drive you want to scan.
- Scan for Files: Click “Scan” to start the search for deleted files.
- Preview and Recover: Preview the files and select the ones you want to recover. Click “Recover” to restore them.
Stellar Data Recovery
- Download and Install: Download Stellar Data Recovery from StellarInfo and install it.
- Launch Stellar: Open the software and select the type of files you want to recover.
- Select Drive and Scan: Choose the drive to scan and click “Scan” to find deleted files.
- Preview and Recover: Preview the recoverable files and click “Recover” to restore them.
5. Professional Data Recovery Services
If the above methods do not work, you may need to seek help from a professional data recovery service. These services use advanced techniques to recover lost data but can be costly.
Prevent Future Data Loss
To avoid data loss in the future, consider the following:
- Regular Backups: Use Time Machine or another backup solution to regularly back up your data.
- Cloud Storage: Utilize cloud storage services like iCloud, Dropbox, or Google Drive to keep your important files safe.
- Data Recovery Software: Keep reliable data recovery software installed on your Mac for quick access in case of accidental deletion.
By following these steps, you should have a good chance of recovering your permanently deleted files from a Mac.