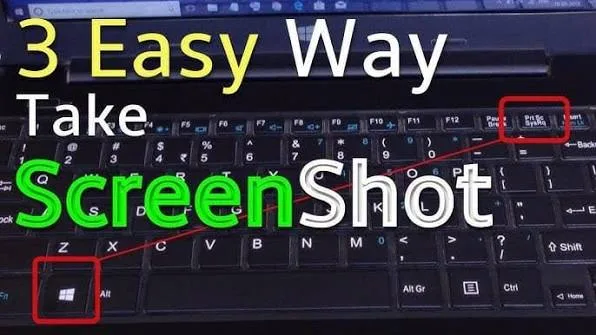
Sometimes the easiest way to explain a laptop problem is to show it. A strange error message, an online receipt, a software screen or a step-by-step tutorial can all be captured directly from your Windows laptop.
Windows includes several built-in ways to take screenshots and record your screen. Once you know the right shortcut, you may not need to install another application.
How to Take a Screenshot on a Windows Laptop
The simplest method depends on what you want to capture.
Press Windows + Shift + S to open the Windows screen-snipping interface. You can then select the part of the screen you want to capture.
This method works well when you only need one section of a webpage, application or document rather than the entire display.
Useful Windows Screenshot Shortcuts
| Shortcut | What it does |
|---|---|
| Windows + Shift + S | Select an area of the screen to capture |
| PrtScn | Captures the screen using Windows’ configured screenshot behaviour |
| Windows + PrtScn | Saves a full-screen screenshot automatically on supported Windows systems |
| Alt + PrtScn | Captures the active window on supported systems |
Some laptops require you to hold the Fn key as well because the Print Screen function shares a key with another function.
Where Do Windows Screenshots Go?
The destination depends on how you capture the image.
Some screenshot methods place the image on the clipboard so you can immediately paste it into Word, Paint, WhatsApp or another application.
Other methods save the screenshot as an image file automatically.
If you cannot find a screenshot, check the clipboard and the Pictures folder, particularly the Screenshots folder on systems that automatically save captured images.
How to Capture Only One Part of the Screen
Press Windows + Shift + S.
Windows will dim the screen and provide several capture options. You can select a rectangular area or another available snipping mode.
After selecting the area, Windows copies the capture so you can paste it elsewhere.
This approach is useful when you want to send someone an error message without exposing unrelated information elsewhere on the screen.
Why Partial Screenshots Are Better for Sensitive Information
Imagine taking a screenshot of an online banking page to show a transaction problem. A full-screen capture could accidentally expose your account balance, browser tabs or other private information.
Capturing only the relevant section reduces the amount of information included in the image.
Always inspect a screenshot before sending it. Check for phone numbers, email addresses, passwords, account information, authentication codes and other private details.
How to Use Snipping Tool
Windows includes the Snipping Tool for capturing and working with screenshots.
Search for Snipping Tool from the Windows Start menu and open it.
Depending on your Windows version and installed updates, the application can provide screenshot tools as well as screen recording features.
Microsoft provides current information about the application through its official Windows Support resources.
How to Record Your Laptop Screen
Screen recording is useful when a screenshot cannot explain what is happening.
For example, you may want to record a software error, demonstrate how to perform a task or create a short tutorial.
On supported Windows systems, the Snipping Tool can provide screen recording. Open the application, select the recording option and choose the area you want to capture.
The exact controls can vary depending on your Windows version and available updates.
Can Xbox Game Bar Record the Windows Desktop?
Xbox Game Bar includes screen recording features, particularly for applications and games.
Press Windows + G to open Game Bar on supported systems.
You can then access the capture controls and start recording where the feature supports the application you are using.
Game Bar is especially useful when recording gameplay or demonstrating software running inside a supported application.
Screenshot vs Screen Recording
| Task | Best option |
|---|---|
| Save an error message | Screenshot |
| Show part of a webpage | Screenshot |
| Explain a software process | Screen recording |
| Record gameplay | Screen recording |
| Send a quick visual update | Screenshot |
| Create a tutorial | Screen recording |
Why Screen Recordings Can Make a Laptop Work Harder
Recording a screen requires additional processing and storage activity.
Gaming or recording high-resolution video can place a noticeable workload on the laptop’s processor and graphics hardware. The final recording can also consume a large amount of storage space.
If your laptop becomes slow while recording, close unnecessary applications and check resource usage in Windows Task Manager.
Our Windows Task Manager guide explains how to identify CPU, memory and other resource problems.
How Much Storage Does Screen Recording Need?
There is no single file size because the result depends on factors such as resolution, frame rate, compression and recording duration.
A short demonstration may take little space, while a long high-quality recording can consume hundreds of megabytes or more.
Before recording a long session, check that your laptop has enough free storage.
An SSD with adequate free space can make file handling much more convenient, especially when you regularly create recordings.
How Students Can Use Screenshots and Recordings
Students can capture difficult software steps, save online learning material where permitted and record demonstrations for presentations.
A screenshot can also help when asking a lecturer or technical support person for assistance. Instead of typing a long description of an error, you can show exactly what appeared on the screen.
For students who need a laptop for classes, research and general schoolwork, our guide to laptops for online classes in Lagos covers other features worth considering.
How Freelancers Can Use Screen Recording
Freelancers can record short demonstrations for clients, document software problems and create tutorials.
A screen recording can also help when explaining a website change. Rather than writing several paragraphs about where a problem appears, you can show the exact page and action that produces it.
Keep client information private when recording. Close unrelated tabs and applications before pressing the record button.
Common Screenshot Mistakes
Capturing the Entire Screen Unnecessarily
If someone only needs one error message, sending a full desktop screenshot creates unnecessary clutter and may expose private information.
Forgetting the Clipboard
Some screenshot methods copy the image rather than immediately creating a file. If you cannot find the screenshot in a folder, try pressing Ctrl + V inside Paint, Word or another suitable application.
Recording With Sensitive Information Visible
Close banking pages, private conversations and personal documents before recording.
Ignoring Storage Space
Long recordings can consume substantial storage. Check available space before starting a large project.
What If the Print Screen Key Does Not Work?
Not every laptop places the Print Screen function on a dedicated key.
Look for labels such as PrtSc, PrtScn or another similar abbreviation. Some compact keyboards combine the function with another key, requiring the Fn key.
If the physical key remains unreliable, Windows + Shift + S provides another convenient way to capture the screen.
Do You Need a Powerful Laptop for Screen Recording?
Basic screenshots require very little processing power. Simple screen recordings also work on many ordinary laptops.
More demanding workloads change the picture. Recording gameplay, editing long recordings or capturing high-resolution video benefits from stronger hardware.
If you are buying a laptop for content creation, gaming or video work, consider the complete system rather than choosing based on processor name alone. RAM, SSD performance, graphics capability, cooling and display quality can all affect the experience.
Final Advice
Windows already provides several useful tools for capturing what happens on your laptop screen. Learn Windows + Shift + S for quick screenshots and explore Snipping Tool when you need more control or screen recording.
Use screenshots when a single moment explains the problem. Choose screen recording when movement, clicks or a sequence of actions matter.
Most importantly, check what appears in the capture before sharing it. A few seconds of preparation can prevent private information from ending up in a screenshot or recording that was meant to solve a completely different problem.